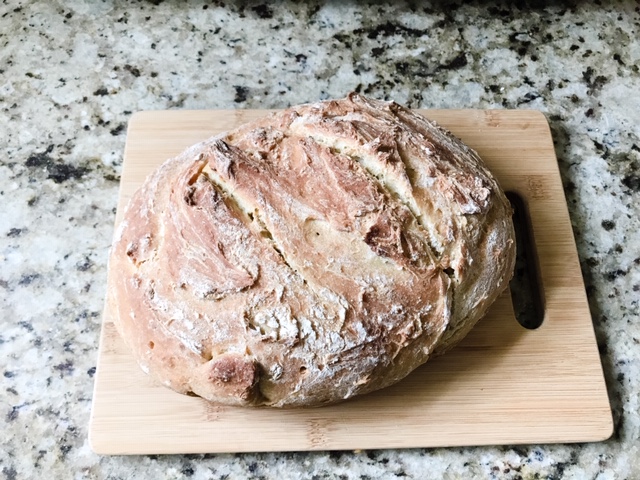
For those of you who I don’t know, I’m gluten free. Having this allergy definitely threw a wrench into my bread baking quarantine plans. But, thanks to some amazing gluten free bloggers, resourceful family members and a little trial and error I have been able to enjoy some amazing gluten free sourdough bread. Those of you who are gluten free know what it’s like to not have the same access to this homemade doughy goodness as everyone else so when I finally figured this out, I was sold and have been making it almost weekly since.
Health Benefits
I also read Dr. William Li’s book Eat to Beat Disease during quarantine and learned that sourdough also brings with it some great health benefits. Sourdough is made with a natural bacteria called lactobacillus rudori which actually helps to build our immune system. Delicious and good for me? Love it.
Starter
When making your gluten free sourdough starter my lessons learned were to use filtered water (i.e. not tap) and put the starter in the oven with the light on. Since our AC is on pretty high during the summer, the cool dry air often stunted the growth of the starter after feeding. I followed the instructions on Bob’s Red Mill for the gluten free sourdough starter.
Recipe
Like I said, I tried multiple recipes and I wanted something that offered more nutritional value than one that was made with mostly rice flour. I ended up creating my own and want you to know that it is fabulous!! I use buckwheat flour, sunflower seed flour, oat flour, brown rice flour, and arrowroot flour. This recipe gives you the best sour taste, a crunchy crust, and light dough inside. It is a little more labor intensive but it is well worth it! Plan ahead since you will need to make sure 1) you have your starter ready and well fed prior to the day you are going to bake and 2) can let the dough rise overnight.
Equipment
Dutch Oven: I highly recommend using one if you have it. Your bread will turn out much better with a crunchier crust and softer inside.
KitchenAid Stand Mixer: This is an essential tool in our kitchen. It makes mixing everything together a breeze and the ingredients are incorporated much more thoroughly.
Scale: You definitely don’t need to have a scale but your baking will be much more consistent if you do use one. This scale is accurate, sturdy, has responsive buttons and a platform that comes off for cleaning.
Grain Mill: I had a hard time finding sesame flour and so needed a way to grind the sunflower seeds. Attaching this onto our KitchenAid made the process quick and easy.
Parchment paper
Measuring spoons
Measuring cups
Large bowl
Tea towel
Plastic wrap
Ingredients
Dry Ingredients:
3/4 cup buckwheat flour (90g)
3/4 cup sunflower seed flour (50g)*
1/2 cup arrowroot starch/flour (50g)
1/2 cup brown rice flour (50g)
1/2 cup oat flour (40g)
3 tablespoons psyllium husk, whole (14g)
1 tablespoon coconut palm sugar (8g)
½ tsp baking soda
2 tsp baking powder
1–1/2 teaspoon sea salt (6g)
Wet ingredients:
2 T apple cider vinegar
¼ cup olive oil
1 cup active GF sourdough starter*
1 ¼ cup club soda
Instructions:
- Preheat over to 200F.
- Bring all ingredients to room temperature.
- Cut a piece of unbleached parchment paper that will fit inside the Dutch Oven, set aside.
- Beat the following ingredients together in mixing bowl: apple cider vinegar, olive oil, gluten free sourdough starter. Mix until smooth and thickened, approximately 2 minutes.
- Place sifter inside (or on top) mixing bowl, sift and combine all dry ingredients; flours, psyllium husk, coconut palm sugar, baking soda, baking powder, salt.
- Slowly begin to stir in dry ingredients with club soda, beating with paddle attachment on a stand mixer or using a wooden spoon until the batter is smooth and all dry ingredients are completely integrated. Mix for two minutes with mixer, longer with spoon method.
- Turn oven off.
- Transfer the dough into a large bowl or basket (lined with a clean tea towel) and dusted with a little flour. Loosely cover with plastic wrap and let rise in a warm oven for 3 hours.
- After 3 hours, remove to refrigerator for overnight rise.
- Next day, bring the dough to room temperature.
- Preheat your oven to 450 degrees F, at least 30 to 45 minutes before you are ready to bake your loaf. You will also need to preheat your Dutch oven (or baking stone) while the oven is warming up, everything needs to be hot!
- Take your piece of parchment paper from Step 3 and carefully flip your dough onto the paper. Remove the tea towel slowly to help maintain the shape of the dough.
- Dust the top with a little buckwheat flour.
- Score your dough boule. With a sharp knife, cut a couple ¼ to ⅜ -in deep curved lines across the dough.
- Remove Dutch oven (or baking vessel of choice) from the oven. Be careful; it will be hot! Transfer the dough with parchment paper into the Dutch oven, cover and return to oven. Bake for 25 minutes covered, then remove the lid and bake for another 25 minutes. At the 50-minute mark, you can finish baking the loaf placed directly onto the oven rack (without parchment paper) for another 5 to 10 minutes. The buckwheat sourdough should be ready when it sounds hollow and crusty when tapped with a finger.
- Let the load cool. Resist the urge to cut it right away; it needs time to finish setting. Once cooled, slice your loaf, enjoy it fresh, or toasted with your favourite spread or jam.

